How to properly hang a Nodor-Swiftflyte dartboard
As with almost anything we do in life, practicing and practicing often will often lead to an improvement in that particular skill. Dart players are no different and having your very own dartboard to practice on several times per week will help you to improve your level of play.
Choosing Your Dartboard:
With proper rotation and care, your board should last between 1,000-2,000 hours of play time. When you consider that most full-time jobs are 2,000 hours per year, that's a lot of playing time! Choosing a good quality dart board is important and actually quite cheap when you consider the amount of play time involved. Many good players will spend more money over time on flights and shafts than they will on board purchases. That said, some boards are definitely better than others. Rather than choosing a $30.00 made in China board, which may seem like a responsible purchase at the time, needing to buy 3 or 4 of them over the course of a year won't be much fun - for you or your wallet.
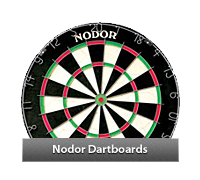
We recommend the Nodor brand of dartboards as they are constructed properly, do not dry out as quickly as other boards and the wires are strongly embedded into the board so that they don't pop out. Here are a couple of choices:
Consider that paying $80.00 for a dartboard that lasts for two years is the same as paying a litte more than a penny per day on something you'll get hours and hours of enjoyment out of. Trust us - relative to the quality of other dartboards, these are reasonable prices. Nodor is also the brand that the professionals players use at their tournaments.
Backboards:
You should also have some sort of protective backboard that will catch wayward darts and save your walls from becoming pockmocked with little holes. There are many types of backboards - including cabinets that the boards sit inside of - and we've linked to a couple of different ones below to get you started:
Choosing The Right Area:
Now that you have a dartboard and a backboard, it's time to set them up. Before you begin, however, find an area where there is plenty of space but does not have lots of people walking past. Ideally the area should be approximately 11 feet long and 5 feet wide, with no obstacles cluttering the way and all breakable objects removed. A quieter area in your home is also preferable as darts is a game that should be played with you being able to concentrate.
The wall on which the board will be mounted should have a flat surface. A dart board cabinet has the added advantages of providing storage space and allowing you to shut the board away when it is not in use, but won't provide the wall-coverage that other surrounds will. You should also take into account the flooring of the area. Ensure that the floor does not slant, since this will result in a difference in height between where the player stands and where the board is mounted.
Avoid concrete surfaces, as these tend to damage the shafts of the darts when they fall on the floor. Wooden floors will become perforated with holes after a while and carpeted areas will become worn over time. A dart mat can be useful since it will not only protect the floor, but will also mark to correct distance from the throw line to the board. If you do not have a dart mat, you will need to mark the throw line (the line the player must stand behind when throwing) with tape or better still, a screwed down wood or metal bar. This should be approximately 3' in width and exactly perpendicular to the face of the board.
When hanging the board, the correct height should be 5'8" from the centre of the bullseye to the floor. Note: This is important! While you can always adjust the distance with which you throw to the board, once the board is hanged you cannot adjust the height of the bullseye. Quality dart boards will be hung from the centre to help with this measurement. However, if your board hangs from the top, you will need to take into account the distance from the hanger to the centre of the bullseye and add it to the height.
The throw line (or Oche) should be exactly 7' 9 1/4" from the face of the board as illustrated in the diagram below. Finally, you should ensure that there is adequate room for any spectators and that a scoreboard is placed adjacent to the board. Keep in mind that anyone chalking should be far enough away from the dartboard to avoid any potential accidents. Of course we don't recommend that a person should throw a dart while anyone is standing nearby, but safer is always better and the farther they are away from the dartboard, the better.
Lighting:
Proper lighting is essential in any room you choose to hang your board in. It's not always possible to have ideal lighting for a board, but try to avoid heat-generating spotlights if you can, as they will dry the board out and prevent proper 'healing' which will mean darts will not stick properly and will fall out. If you have no option but to use spotlights, remember to turn them off when you're not playing to extend the life of your board.
Track lighting with the appropriate number of lights are ideal as bulbs can be easily replaced and the lights slid along the rails to accommodate light changes during the day if your boards are near windows.
Ideally you want to position lighting so there are no shadows. Not being able to see properly where you dart has landed will lead to distraction and missed shots on the line.
Mounting Your Board:
The majority of dartboards come with very simple mechanisms for setting them up. There is a screw in the back of the board and the head of that screw rests on a bracket that is secured to your wall. There's not much to it, but you will need a few tools to get the job done. Here's the quick list of what you'll be needing:
- A Robertson screwdriver
- A Phillips screwdriver
- A drill
- A drill-bit
- Drywall screw-plugs
- 4 screws
The (good) boards usually come with a mounting kit that will include the brackets and screws.
The first thing to do is to measure 5 feet 8 inches from the floor up the wall and to mark that point with a pencil. This is the absolute center of the bullseye and is where the center of your board will rest.
Next, take the bracket and place it against the wall so that the resting area is in-line with the mark you made for the bullseye. Make sure the bracket is level and make 4 marks with your pencil inside each hole. Now you just need to drill the 4 holes, insert the wall plugs, and screw the braket onto the wall.
There should be a little pre-drilled hole in the center back of your dartboard and a bigger screw that came with the dartboard. Screw that into the board so that almost just the head remains outside of the board and fit the board onto the bracket so that it fits snugly into the holding area. The center of your bullseye should now be exactly 5 feet and 8 inches from the floor. 1/16 of an inch high or low won't matter too much but you really don't want to be out any more than this. If you practise on a board that's too high or too low, imagine the confusion you'll encounter playing at various pubs.
If you are using a backboard such as the ones pictured above, you can simply slip those over the dartboard. If you plan on using a dart cabinet or plywood backboard, you'll have to set it up first and then attach the board to it. One way to gauge the measurement is to make a pencil mark for the bullseye (as outlined above), but to then measure that point to the ceiling. Once you know that number, measure your backboard's center and then apply that to the number you got from the bull to the ceiling and affix your backboard that way. You should be able to drill through the backboard and into the wall to make your holes for the bracket afterward and attach your dartboard to it after that.
The Oche (Throwing Line):
The distance from the FRONT of the dartboard to where you'll stand and throw your darts is 9 feet and 9 5/8 inches. If you are going to measure from the wall outward, remember that the backboard and dartboard need to be added to this calculation, otherwise you'll end up a couple of inches short. Measure the dartboard, and then the backboard, and then add this to the measurement you get going from the wall outward.
NOTE: The measurement 7' 9-1/4" is the distance from the face of the board to the toe line. To measure the proper throwing distance you would add the width of the board and backing to that figure. If the dart board is 2" thick and the backing is 1/4" thick, your measurement would be 7' 9-1/4" + 2-1/4" = 7' 11-1/2"' total from the wall to the line.
There are various ways to mark your throwing line and depending on your flooring you may want to choose the least harmful method. A piece of tape - while unsightly - may suit your methods as it can be removed after play and won't harm your flooring.
Caring For Your Dartboard:
By the nature of what dartboards are made from, they will eventually dry out. If you've ever seen an old dartboard in a pub where the bullseye looked like it had seen better days, this is most likely the cause. While there's not much you can do to stop the process, you can definitely slow it down by keeping it out direct heat sources - such as constant sunlight - and by not having the lights on it when you're not using it. Never under any circumstances use water to soften it up, either, as it only accelerates the drying-out process.
Another thing you can do to even-out the wear and tear is to rotate the dartboard every so often so that each number will experience the same amount of punishment. To do this, simply remove the number ring and rotate the board to the right and then replace the number ring. If you don't rotate the board, you'll quickly notice that the wires around the popular numbers become dented and flat (which induces bounce-outs) while the not-so-popular numbers remian clean and shiny. Ideally they should all look the same and once your board's wires are completely flattened and the bullseye is dried out it'll be time for a new board.
Nodor Gives Back!
Apart from supporting darts in Canada by being the official board of the National Darts Federation of Canada, Nodor donates a portion of each dartboard sale in Canada to the NDFC. That means when you buy a Nodor board, you are also supporting darts in Canada. Please support FGBradley's for all of your darting needs as they have supported Torontodarts.com from the start and they proudly carry the Nodor dartboard products.
Receive our newsletter and win!
Every two months or so we send out our newsletter that's packed with local darting news, tournament dates and lots of free stuff.

ADVERTISEMENT
We're on Facebook & Twitter!
Follow us on Facebook and Twitter and keep up to date with everything in the world of Toronto Darts!
ADVERTISEMENT